We are working hard on the level editor for
Pig Eat Ball to make it super easy to use, and very powerful so everyone can have fun making action-packed, and barf-packed levels to share with their friends via Steam Workshop.
While
Mario Maker is boosted by the legendary Super Mario Bros. brand, it still has plenty of excellent design elements for a level editor/level sharing system.
This is my detailed breakdown of Mario Maker's design, and what we'll be keeping and dropping for
Pig Eat Ball. This is
NOT about designing the levels themselves, this is about how Mario Maker itself is designed. There's lots of small notes here that may help others creating a game with an integrated level editor.
The Good
Easy and Fast Playing and Editing
Clicking
"Play" drops you into the level within a second. It's very fast and feels great.
This also starts the player *wherever you are* in the editor at the moment. It doesn't always start you from the proper level start.
It starts you at the 'cursor' point, where Mario is. This is very useful for testing your level but could be a little confusing at first.
If you want to play from the level start, you have to use the "Select" button on the controller. (That part is strange--you'd think the Start button would start the game. The Start button opens the main menu.)
Clicking
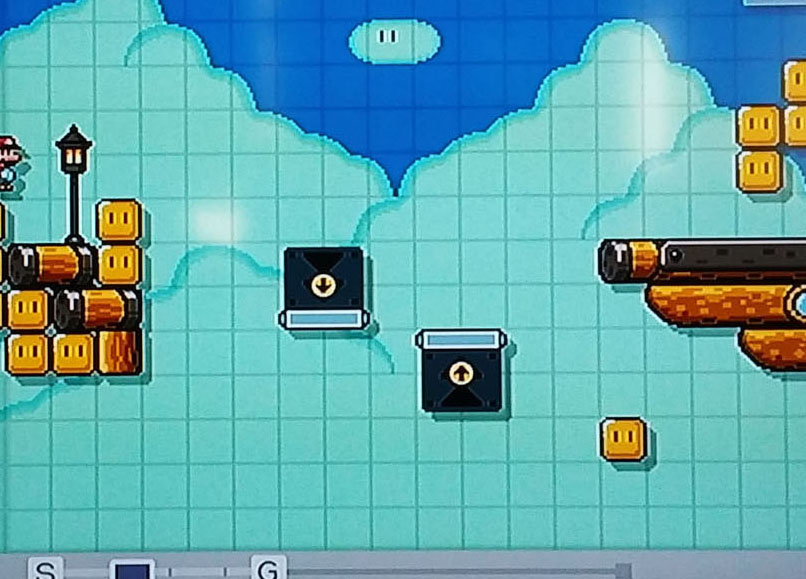
"Edit" in the level you are playing pulls you right back out to the editor. The camera and the Mario cursor is now updated to match where the camera moved during playing the level. I'm thinking for Pig Eat Ball we'll have a 'snap' button to pull you back to the level start. This has an S-G system at the bottom that doesn't make sense for our game.
Single-Touch and Shake Mechanics
There's a lot of power built-in to the single-tap/hold system. For example the 'moving platform' track system has a lot of power and control built-in. If you click and drag the end points, you can extend the track. If you tap the end points, you can remove them creating a 'dead-end' track. Grabbing and shaking curves in the tracks can make them diagonal, or curved. Dropping enemies and objects onto the track attaches them to move with the tracks.
'End-Point' Grabbing
If you grab the end point or edge of some objects, a special yellow dot with arrows shows up which lets you see that you can move and change the shape of that object. It creates a lot of extra depth of changes to certain objects.
Rotating Objects
If
an object can rotate, a yellow circle with a black arrow appears in the
middle after you place it. Tapping this arrow rotates it 90 degrees.
This seems like a good way to embed a new, contextual control, as not
every object can/should be rotated. Some other objects rotate near the edge, but the concept is the same. The contextual rotation button appears as needed.
Erasing Objects
Erasing is a "mode" in Mario Maker. What's nice is it moves the object list off the top of the screen to make it more apparent what's happening. However the "boing" noise is really annoying, but maybe it's there to help remind people they are erasing? In any case it's pretty annoying. You can get to the eraser mode by holding two buttons or by clicking the icon on the right side.
Game Changes
Changing the game-style by a single-drop down button is great. However it can be confusing that certain objects are particular to certain games.
World Changes
In a similar way you can change the world to underwater, or air-ship or more by using the area drop-down on the left.This system, of picking the setting can greatly change the gameplay (such as putting Mario under water).
Object List Palette
The object palette at the top is a good way to give the player some objects to place, but not overwhelm them. You can touch the drop-down arrow to see a full list of objects. You can also customize each palette by dragging and dropping objects (after clicking a Customize button). Having only one part of the list can feel limiting but the large icons support the couch-experience (with players sitting an average 6 feet away from the TV).
Timer and Scrolling
The clock in the upper right leads to a menu for the time limit for the level and the scroll speed. It may not look like a button though, so that's a bit of a UI problem.
Destroying/Resetting a Level
The rocket in the lower right can reset the level to blank, if you hold it for 3 seconds. It has a fun
animation too. Again though, it may not be apparent that this will reset the level.
Automatic Layering
Instead of giving direct control and power to the player as to which layer holds which of your objects, this auto-layers all objects for you. You lose a little control, but it makes the interface and controls much easier to not have to decide to put certain background objects in the background layer, and mid-ground objects in a mid-ground layer, for instance.
Smart Object Placement
Background objects will overwrite other background objects if you drag them around/place new ones. If you have a wall object selected, drawing new objects won't delete the enemy as you draw. But if you have a spike block selected, this can draw over other walls.
If you try to touch-place an enemy on a wall block, you'll end up grabbing the wall object, allowing you to move it. If you touch background/sky, you'll place a new enemy. And then if you drag the enemy, it lets you drag the enemy over the wall.
Enemies that were placed on hard walls, are simply deleted on level start.
You can tell a lot of 'invisible' work went into these interactions to get them to be intuitive.
Undo System
Undo and Redo is a lot of work for the game developer, but they have it here. It's obviously a very useful feature for the player.
This is in the 'dog' icon on the lower right. It's cute to have it characterized with a dog (or simply any cute icon) but it's not intuitive to have it behind a random icon.
 |
| The expected Undo/Redo arrow icons |
Typically Undo/Redo are slightly curved arrows pointing left/right. Not to be confused with "rotate" circular arrows.
Here is an
interesting breakdown as to how we got to the "slightly curved arrow" icons for undo/redo which most people recognize.
Also notice there is no
Redo option in Mario Maker which would be nice.
Changing Level Size
The "S" and "G" buttons at the bottom show how big the level is, how big it could be, and easily let you reshape the size of the level. That said, the goal of the level must always be on the far right, and players can't really make a level in which you go past the goal, then backtrack, or put a goal to the left of the start.
The game world is a maximum of 2 screens high. This is shown in the grid, with an extra thick line between screens. The maximum width is 10 screens wide which is a good sized level.
You can reposition the goal to be just higher than 1 screen high, but not very far into that second screen.
This restriction though on level sizes doesn't allow for interesting, vertical level designs to be created.
For Pig Eat Ball, at this point, I'm thinking we should probably include some simple way to snap the player's camera back to the player start when in the editor.
Main-Sub Areas
It's easy to create multiple areas to go between with tubes and doors. By placing a tube in the level, the way Mario would normally get access to a sub-section, the sub-section interface is unlocked. It's confusing in a way that interface is not always there but greyed out. But is intuitive once you consider how Mario normally would reach that area.
Level-Sharing via Code ID
Giving
the player the option to upload their level then share a 16-digit
alpha-numeric code for other users to find their level is great. Finding
a particular player in the level sharing list would be tough. But with
this code, players can zero in more easily on a special level that
everyone is talking about.
Important! The ID
code is shared on the level start.This is very good, because if a person
is watching someone else play this on video stream, they can pause the
video, see the ID, and type it in, to play that level. It's a low-tech
way to share videos, but because it's embedded in the level start (and
video) it's a easy way to always make sure the code is shared.
UNLESS,
people compile videos together and edit out the level start. Therefore,
could be even better, to have the title and code faintly displayed on
the top of all levels.
Game-ifying Uploads
If players 'star' (mark it as liked) your level that you've uploaded, you'll earn medals. Medals are an outward show of ability and success as a level creator. Medals increase the total number of courses you're allowed to upload. This area also has a list of all courses you've played from others.
Starring versus Likes versus Favorites
Starring a course is the equivalent of a "Like" on Facebook. It's a thumbs up that says you enjoyed the course. It lets the Maker know you liked it, which in turn bumps up their recognition publicly. You can find courses you've 'starred' in your Mii icon settings area. This acts as a 'favorites' section. It's interesting that "Star/Like" encourages a player to think about how they are rewarding the Maker, but calling it a "Favorite" would keep the player himself more of the subject. It's the "player's favorite" versus a level they "Liked" or "Starred". One is a reward for the Maker, the other more about the players.
A single star/like is obviously more simple than a 5 star system or anything like that. But it takes a little more to explain it's actually a 'review' system for the level. Maybe this could be more clear if the ending said "Review this Level" message above the star.
Makers
The Makers system is great way to showcase user-created levels which encourages more people to make more high-quality levels. This part was really important in terms of supporting users making good levels and helping them share their levels. It helped makers get fans of their levels, and then be inspired to make more levels. Supporting and highlighting the Makers helped the game grow the community and put a good experience forward to people coming to play others levels.
Full In-Game Manual
A very detailed manual explaining all parts of the editor and game exists. Although most people wouldn't want to spend the time reading through it, it's great to have as an option and may have tidbits some creators missed. Though I would imagine most will probably try online before looking in the in-game manual.
But, that said, I learned that you can 'see' the ghost-path of mario if you played and died in your level, by clicking on the mario icon on the bottom. I didn't know this, and it wasn't apparent in the editor.
In-Game Pause during User-Made Level
Gives good options for 'starring' during gameplay, and adding comments. Allowing several easy places to have players rate/star someone's level helps encourage starring.
Playfulness and Character
There are a lot of the touches in Mario Maker that make it fun. It's pretty
cool that you can play a tiny level right in the title screen of the
game. On the title screen, touching any of the title letters creates a different effect such as dropping in powerups, or enemies, or new screen effects. Touching anywhere on the sides drops in random enemies to fight. Different interactions in the editor itself have lots of fun effects, such as tapping on doors in the editor will make it sound like someone is knocking on the other side of the door.
Uploading and Course Clearing
It makes sense to force the player to beat the course before uploading. This proves that the level is completeable and greatly reduces the number of frustrating levels uploaded.
During a 'clear check' playthrough, the edit button is not there. The only way to quit is to click the +button and then 'Edit Course'.
Clicking the - button in the editor plays the level, but from the level start.
Combining Objects
This is mostly good, in
terms of it being intuitive to drop one object on another and then have
them do something new. But it's also a little confusing at times as to
when this behavior works.
Administration
MM shows a message to the player that they
will delete courses the player has uploaded if the courses:
- find a bug
in the code,
- exploit a bug to get a new world record,
- obtrusively bother
other creators for 'stars'.
Basically they are trying to police the
community and help it be a great place for people to make levels. Seems
like a good move if you have the manpower.
Community Policing
Nintendo does not a filter for 'explicit' content created in their levels, but does have a 'report level' button if you click on a level's info. From there Nintendo apparently reviews the level for deletion or penalizing the Maker.
User-Level Difficulty Filtering
Levels uploaded by players are automatically sorted into All, Easy, Normal, Expert, and Super Expert difficulty options. Not sure how this is done, but I assume it's based on player deaths/clears/early exits.
Gameplay Rules
Everyone knows how to play a Mario game and lots of players know a lot of the gameplay objects in the game and how they act. All these objects have been in previous games. This is good as no player has to learn your game *and* learn the editor.
Different Editor UI Style
Having a new style for the buttons and menus for the Mario Maker system itself was a smart choice. The style is not pixel art like original Mario nor smooth 3D like the Wii U Mario. It's a simple, clean, 2D look that allows for high contrast between the editor portions of the game and the game itself. It's very clear what parts are what.
The Bad
The Menus
The menu system feels sprawling, confusing, and it's easy to get lost. Things should be simple are hard to find. Things that you'd think would be in one place are somewhere completely different. The general feeling of using the menu system is having to forget what you know, and instead learn something completely different.
Maybe "what I know" is Microsoft Windows? Somehow MM always feels like the menus are in a weird place.
Let's look at something simple like the how the game starts.
Title Screen->
"Make" or
"Play"
"Make" goes to the "Course Maker" (the level editor)
"Play" opens two sub-buttons. "10 Mario Challenge" and "Course World".
Clicking "10 Mario Challenge" goes to set of 8 levels in which the player must beat with only 10 lives.
Clicking "Course World" opens a new menu that shows a different,
100 Mario Challenge contained inside it, in addition to "Courses" and "Makers" sections.
There are some good intentions here, but things still feel off. It's good to have a collection of algorithmic/curated levels to give players a good experience of user-made levels. Assuming those levels in the 100 Mario Challenge are some of the highest starred levels and best designed.
Maybe it's when you click "Play" that it takes you to a sub-menu about "10 Mario Challenge", but then you click Course World and see a "100 Mario Challenge".
Why is the 10 Mario and the 100 Mario Challenges not both inside the Course World area? Having a "Quick Play" option seems more intuitive even in the naming scheme.
Player Account and Uploaded Levels
In order to find your player account and see what levels you've uploaded you have to visit Course World. You can't find the player settings button in the Make section of the game where you upload levels, or in the Coursebot section where you save/upload them either. It seems weird to 'hide' the list of your uploaded levels.
Not bad or good, but if you click Upload again, and clear the level you'll upload the same level twice and it can have the same name, but will get a new course ID.
Hidden IDs
While it's great to have an ID code to share your levels, it's actually a pain to find it. You can find the code when you clear your level for upload.
The only other places to find it is in your Miiverse post history, or you can go Title->Play->Course World->Mii Face (top left) then search your list of uploads->Find the level->Click Level->then click the ID button to show the actual ID.
Menu Issues - Save/Load
The save and load options are under a
robot head icon. It's confusing and strange to find them there, and not
under the 3-line menu button.
Clicking 'New Save' then sends you to a entirely new menu area that is pretty intimidating though cool looking. The listing of "world 1" and "world 2", etc is confusing as well. Do only saves for objects from world 1 go into world 1? Turns out you can put any level in any slot, but it simply is strange.
From there it goes to "Name this course!" which seems fine. It lets you enter the course name.
After it saves, it returns you automatically back to the editor.
From then on, you have the "New Save", "Save", and "Load" options. This is layout and naming seems reasonable.
When saving a new level, why doesn't the Coursebot-save menu open to the bottom where there's an open slot? Instead it opens at the top making you scroll through all your previous levels. It's annoying and seems like a small but helpful fix.
Upload Process
In order to upload your game, you have to do a "New Save". But the publish button isn't there, and greyed out, it's simply missing altogether. There's no helper indication on those menus as to how to open it up.
Once you New Save your level, Upload is now an option. Clicking Upload asks the player if they are ready to finish their level.
It's minor but I feel like the level could use a "Upload Check" message in the upper right indicating what's at stake.
The process, which is fine but sparse, flows like this:
- New Save level.
- Upload Level.
- Complete the level successfully.
- Fail and the level is restarted.
- Press Pause to exit the process.
- The TV directs you to the game pad. You must name the level then on the gamepad.
- The level is uploaded to the internet.
More Menu Issues - Coursebot
Things get really strange with the 'coursebot'. As you saw the save/load coursebot is picked through the robot head on the right. But if you click the yellow 'main menu' button then two robot heads show up! And they are both head to the coursebot, but they are different! (See above)
Clicking the bottom one can take you to the "you can't save/load here but you can play levels in-order". So the "world" concept you see in save/load comes to fruition, sort of. The circle-arrow buttons on the left (play buttons) let you play your levels in order.
But strangely if you toggle 'my courses' to 'sample courses', the 'play-world' buttons are gone! You can play them in-order, but not all together, 4-levels in a row.
Why are the options to play levels in a row in the regular coursebot you find with save/load? Why are there two coursebots that are the same but different? Why not simply toggle options in there?
No Eyedropper Tool
There is a simple "copy" option that lets you copy a single object as long as you are holding down certain buttons. But there is no simple "switch to placing this object that is currently under my cursor" option. It's common to be in a level, have a certain object list showing, but want to start drawing with a new object that is in the level, but not in your object list. There should be a simple way to select that object as seen in the level to start drawing with it--beyond the copy method. This is typically a represented as an 'eye dropper' in drawing programs.
Hidden Objects
It's cool that there's a lot of options built-in to some simple controls. But sometimes the "shake" option to find special objects makes you feel like you don't know where everything is.
Feeling like you don't know where all the objects are or where they are hidden is annoying when trying to make a level. But it also feels cool when you finally find them. This could be good in terms of building community, to have "hidden" objects which encourages players to talk to each other and figure out how to find them. It is annoying to not be able to see all objects or find them but might be helping the game in terms of community.
Shaking Controls
Having to shake objects to find alternate versions is okay the first time as a fun thing, but as functional method it's annoying. I'd much rather have a simple button that toggles through various options of that object. The shaking option could still be there, but much like how they have a method of holding two buttons use the "Eraser" tool but also have on-screen icon for the eraser, there should be a simpler way to swap object abilities.
No Tags or Filters
Searching for a new level to play is only allowed through 16-digit code system. Players can leave 'comments' on levels, but they can't tag them. There's no tag-search system in Mario Maker, so if a player wanted to find a "funny" level, versus a "auto-scrolling" level, versus an "underwater" level, they don't have that option. There should be filters to let you toggle tags for levels that you either want or don't want. If you're tired of levels filled with hidden blocks, you could filter these levels out. Consider filters for "tricky", "trolling", "art" (or "picture"), or "puzzle", "classic" etc. They'd be great to find different styles of levels.
Lessons to Follow
There's a lot in Mario Maker that encourages players to have fun making levels and to share them. The bright and playful UI, the hidden abilities and controls, and the ease of use can be great.These are the things we are working to bring to the level editor in
Pig Eat Ball, in addition to a few extra tool options, and hopefully more sensible menu layout. All of this will be tied to Steam Workshop for the Steam Early Access version coming out soon. Stay tuned!